 Once again, let's start with downloading the 2014 Version File that we have used on the last to blog entries. With the model opened, we can click Insert, Tables, Design Tables (see left) and open the dialog box shown to the right.
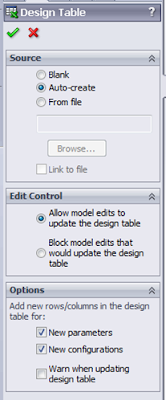
We are going to select the Auto-create button under Source. This will read our model and find any differences and populate them in the design table. Edit Control dictates whether your model will control your design table or if your design table will control you model. This can be set based on your needs. We will use the first option. The options section tells SOLIDWORKS what to consider a Design Table entry. We will select the first two. Once we have all our selections made, we click the check mark. Your interface will bounce around a bit and you will be presented with an Excel sheet in your Graphics User Interface that contains all the current configurations and it will also review the model and list all dimensions or states that are different. You can see below that the model is populated with the 5 configurations that we have used in the last two posts, it has populated the various lengths of the file and we see there are a sketch and a feature that have different suppression states.
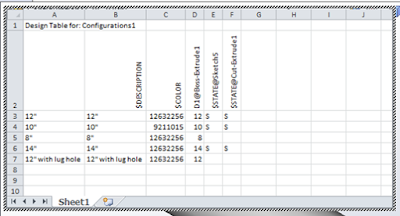
The design table operates using Excel. Any formulas of features you use in Excel are usable here. We need to make a new configuration, so, let's copy the entire row labeled in Column A as 10" and paste it into the next empty row. If you leave a blank row or column, SOLIDWORKS will recognize this and consider it the end of your design, so make sure there are no blank rows or columns.
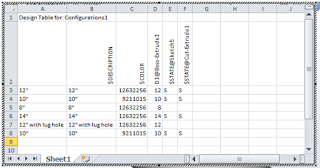
We don't need two configurations named 10", so let's rename Column A and B to 16". We will then go into Column D and change the value to 16. This represents how long the cylinder is.
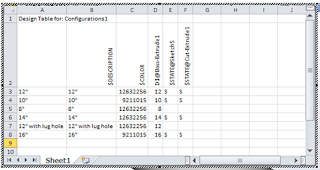
In order to exit the Design Table, you just need to click outside the design table in the GUI. Trust me, when working with Design Tables, you will do this on accident multiple times. :-P (see below on how to get back into the Design Table)
It will do some more bouncing and throw you a dialog box similar to this:
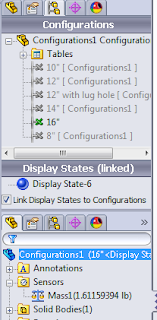 When you select OK, your configurations manager will give you a new symbol next to your configurations. It is the symbol for Excel which indicates that the configuration is controlled by the design table. To edit the configuration, you have to enter the design table. In order to do this, you need to click the plus sign on the Tables folder, right click the design table and select edit table.
Quick Check and the question everyone is asking... What's the mass?
Outside the Exam, Design Tables are a very powerful feature. We use them in my daytime job to control our customer models. The customer fills in some drop down boxes on our website, this gets shoved into the design table and out pops the model the customer needs.
Enjoy,
Bryan

No comments:
Post a Comment