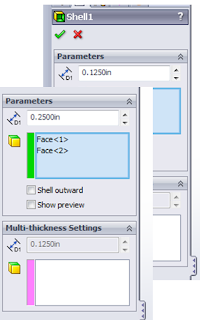
 We start off with a question that asks you to change the wall thickness of this part. I want to touch on this briefly. I have a lot of questions in my classes about shells. In the CSWA exam, there is a question that leads the test taker down this path only to be faced with some serious issues when using it.
If we want to update the wall thickness, we would need to edit the shell feature and change the value from .125 to .250. As easy as that sounds,
Once the wall thickness is updated, determine the mass of the part.

Now, to focus in on the design intent portion. If we take the part we downloaded above, we can see the part and sketch that we start off with looks something like this:

Let's take the above and make a change to the base feature profile so that it looks like this:
You can see that once we rebuild, the part looks like something that we would consider a good part, meaning that there is nothing that indicates a problem.
Let's revert back to the original downloaded state and extrude a cut on the front surface through the entire model.
When we rebuild the part, we see that we have a problem... That cut extrude broke out on the bottom of the handle.
The reason is directly related to the design intent or the way the model was built. We have a base shape, then we immediately move into a shell feature. Now if we cut extrude this feature through all, we see that the shell does not perform like it should. This is due to the shell command offsets from the outer surfaces to create the shell feature. We do in fact want the handle to be tapered on 3 sides, but we do not want the shell to break out of underside of the handle.
There is a very simple fix to this to follow the original design intent. As you can see in our design tree, our sketch and cut extrude are at the bottom of the tree. So we built our base feature, then shelled out based on that shape.

The correction is to drag the new feature to a location above the shell. When we do that, we can see that the shell now follows the new surface in addition to the previous surfaces.

I hope this helps everyone on Segment 2. I've got some special requests for Segment 3. I'll be posting some stuff on that soon.
Enjoy!!
Bryan


No comments:
Post a Comment